My mermaid obsession is something that started a long time ago. I kept looking for an appropriate way to express it. Then it happened: I tried on my first mermaid tail.
It was a tail that a retired mermaid from Weeki Wachee helped me wiggle into.
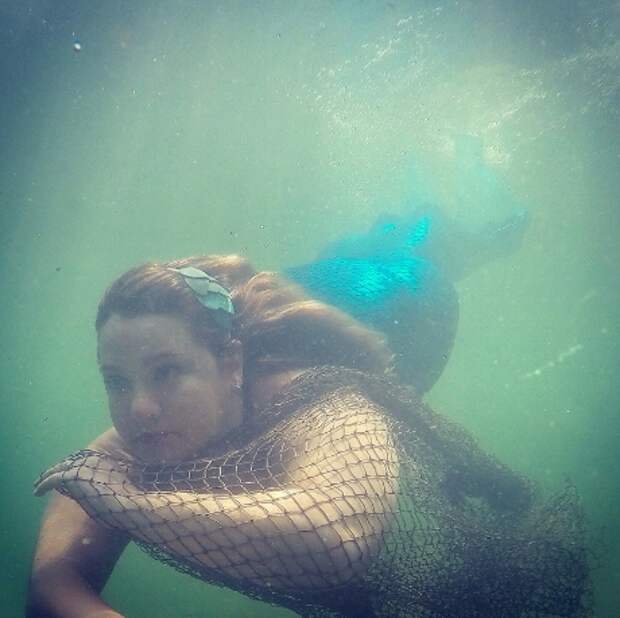
And that was what I had been looking for all this time -- the freedom to glide through the water effortlessly.
Some people might think it's constricting to put on a tail, but for me it felt like freedom. I made my first tail a couple of years ago; here is a quick tutorial to make your own and release your inner sea siren.
Assumptions:
You're familiar with basic sewing and have access to a sewing machine. You have basic sewing supplies like scissors, measuring tape, rulers, pins, and thread as well. This tutorial is for a stretchy, swimmable tail, so you've selected fabrics that will stretch, such as swimsuit or dance type fabrics. Shells are optional.
Fins:
You will need these first. You can leave them as-is or you can trim them with a utility knife to make them more fish-tail shaped. To cut my U.S. Diver Sea Lion swim fins, I just used a ruler and utility knife to trim a diagonal piece from the inside of each fin.
Then I snipped some jagged areas on the corners with kitchen shears just to finish the edges a little. Your fin cutting skills do not need to be perfect because the fins will eventually be placed inside of your tail.
Pattern:
First, I laid down a long piece of paper from a large printer spool (you can also use kraft paper or a few pieces of white poster board securely taped together).
This is also the step where I needed another person to help -- I put on the fins and kept my legs close together at the knees and ankles and lay face up on the paper. I pointed my toes (in fins) downwards so that the fins would be closer to the paper for tracing.
My helper traced all around my lower body, from my waist to the tips of the fins, on each side of my body. Special care was taken with the marker to follow body contour areas. I noted on the paper where my ankles, knees, and waist fell just I would know when I started cutting fabric. The pattern should look like a curvy outline of your lower torso with fin feet.
This is your own original pattern, so cut it carefully along the marker lines.
Fabric and Notions:
You could make a tail out of lots of things, but if you want it to be swimmable, you will need to use an opaque fabric that is a stretchy bathing suit material. You should also pick up some fabric of the kind used to line a bathing suit -- a neutrally colored stretchy liner to give your mermaid tail more structure and stability. The magic quantity of fabric for me is about 2.5 yards of both exterior fabric and liner fabric. If you are taller than 6 feet, then go for 3 yards of fabric, but 2.5 yards should be plenty for a short to average height mermaid.
If you buy a patterned fabric make sure the cut of the fabric will look correct for the direction of the tail. For example, the fabric I used had a fish scale motif. I made sure my cut fabric would have the correct direction for fish scales on the length of the tail. This will totally depend on the fabric you have selected.
For the bottom of the tail -- often called the fish fluke, or fluke -- I purchased 1 yard of organza fabric in a coordinating color.
I also picked up non-rolling elastic for the waist. Measure your natural waist and buy the measured circumference of elastic and then a bit extra in case you mess up something. I purchased about 4 inches extra. The thread I used was polyester thread, also called all-purpose thread.
Cutting and Sewing:
Lay the liner fabric out completely and smooth out any creases. Then, on top of the liner fabric, lay the exterior fabric face up -- meaning the right side of the fabric is showing. Carefully fold both layers over to form a long rectangle of fabric.
It’s like you are making a fabric sandwich that you will cut into. The four layers of fabric, when cut, will form the back and the front of the tail. The tail does not have a distinct front and back since both sides will be identical.
Attach the paper pattern to the fabric with a few pins and prepare to cut the fabric.
When I cut the fabric I left about a half-inch border outside the pattern area as the seam allowance. This part is adjustable depending on your fabric. If your fabric is very stretchy then a half-inch seam allowance is ideal. If the fabric is less flexible, you may want to leave a 1-inch seam allowance for wiggle room.
After cutting, I removed the pins from the pattern and gently placed them into the four fabric layers to keep the fabric from shifting or separating. I used pins along the border of the entire tail, except for the very top (because this is the waist area where the opening with elastic will be placed later). If you have secured the cut fabric pieces securely enough, you can gently slip on the tail to see if you like the fit. Adjust the pins as needed to make the fit tighter or looser in areas as needed.
I needed to move the pins in a little bit to make a tighter fit in the knee area for me.
After any adjustments have been made, start sewing the side seams of the tail. Leave the bottom hem unsewn so that the organza fish fluke piece can be attached later. Stitch the fabric using a zigzag stitch. I don't have a serger, and using the zigzag stitch has worked great so far.
For the bottom organza fish fluke I free hand cut a piece of organza fabric to resemble a fish tail. I cut a piece of folded organza fabric, then I pinned the two sides of the cut organza together and stitched it.
I left a small opening of about two inches wide (at the top) to flip the organza inside out so that the stitching would be on the inside of the fish fluke piece. Once the organza portion was finished, I attached it with pins to the bottom of the tail and I stitched the bottom of the tail closed with the organza fish fluke sticking out, again using a zigzag stitch.
Turn the tail inside out and fold over the waistband to sew in the elastic and create the waist area. When you're finished, just turn the tail right side out.
Insert the cut swim fins down into the tail, all the way to the bottom, one at a time. Then slide one leg at a time into the tail and put on each fin.
Pull up your tail.
You're all done. Swim away in your custom-made mermaid tail -- sailors, beware.